.JPG)
Thingiverse link: http://www.thingiverse.com/make:87676
At this point you may be thinking that you don't know how to write computer programs. You're wrong; you do. OpenSCAD is very easy to learn and you can start simply. I'll walk you though a simple example that will build up to our penny trap model.
Step 1. Install OpenSCAD and learn to type, move, compile, and export.
You can download OpenSCAD for free at www.openscad.org. Once you install the software, open up a new window and type
sphere(20);into the text window. Press F5 and a sphere with radius 20mm will appear in the graphics window. I recommend selecting View/Show Axes from the top menu so that you don't get lost. Here is what this will look like:

So easy! To move around in the graphics window, use the left mouse button to rotate, the right mouse button to shift the view, and scroll to zoom in or out.
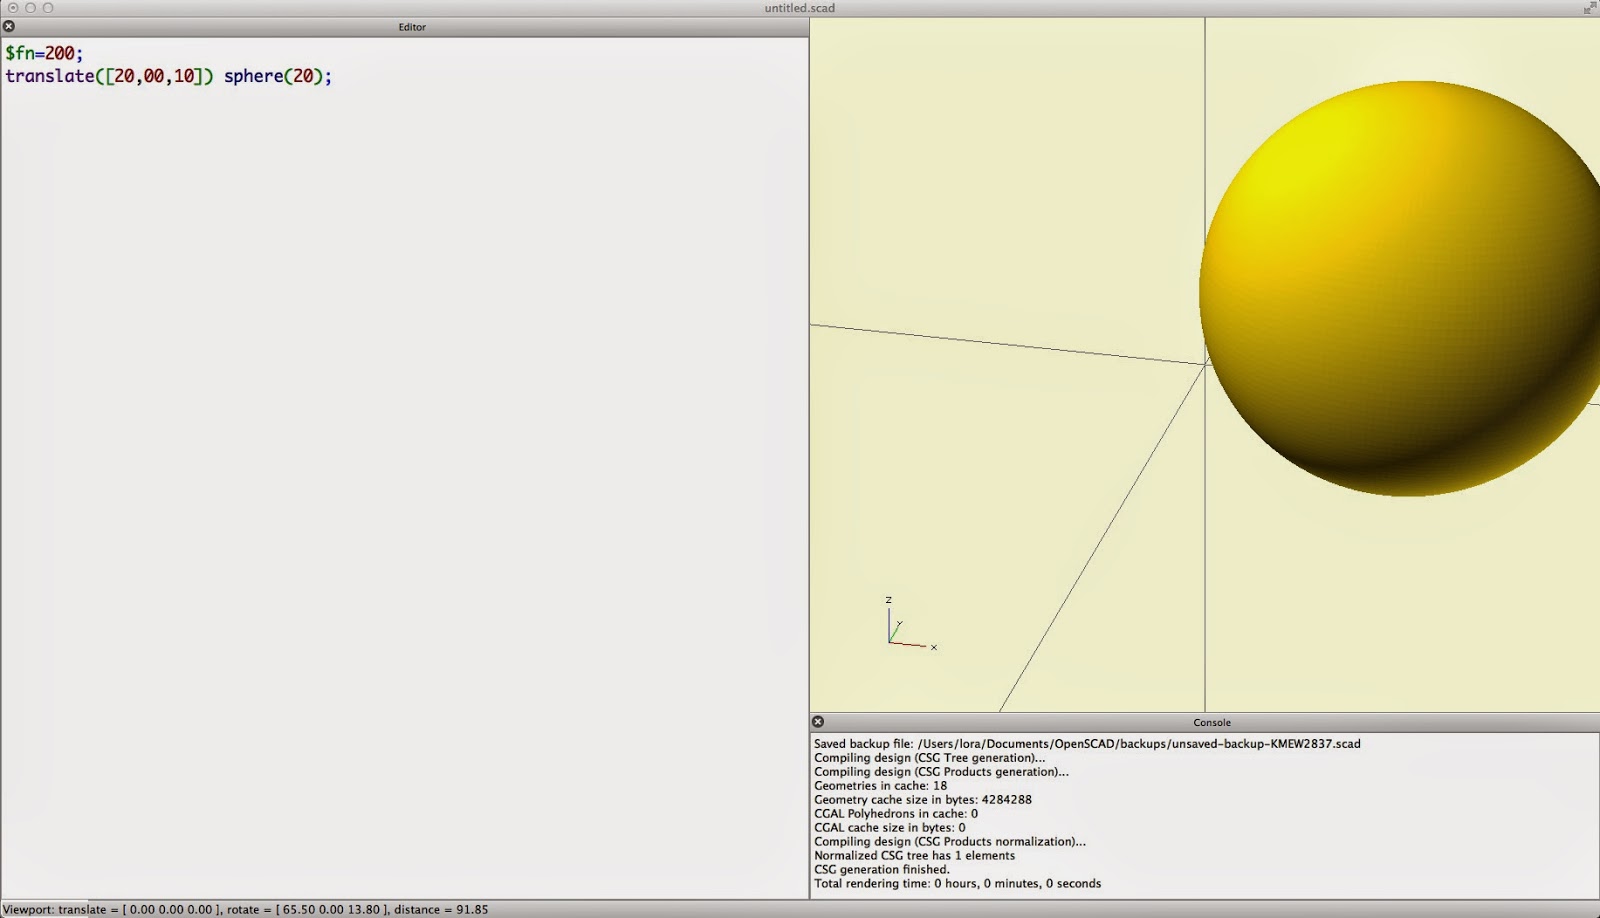
If you want to make a nicer sphere you can change the facet resolution, that is, raise or lower the number of polygons used to make up your object. You can also translate the sphere. The code syntax is pretty obvious and you can learn everything you need to know with the online documentation for OpenSCAD. For example, you could type this:
$fn=200;
translate([20,00,10]) sphere(20);Then your F5 output would be a more finely-constructed sphere, shifted over 20mm and up 10mm:
To export for 3D printing, just hit F6 instead of F5. Once it finishes compiling (which can take a while if you've set your resolution too high, so watch out), use File/Export/Export as STL to export the file.
Step 2: Set up some size parameters.
We'll need to use the diameter of a penny in this model, but we might as well make that a variable so that we can easily resize our model for larger and smaller coins later. Also notice to avoid RADIUS IS NOT DIAMETER confusion we'll define them both:
d = 19.05; // diameter of penny
r = d/2; // radius of pennyStep 3: Make a rounded box.
We'll do this by making eight small spheres (1/5 the radius of the penny), translating them around to the eight corners of a box that is a sized for the penny (a little more than 4/5 the radius of the penny), and then taking their convex hull with the OpenSCAD hull module. We're making this more complicated than necessary right now, with all these variables; however this will help us keep everything parametrizable for resizing later.

Step 4: Chunk your code into modules.
In OpenSCAD, a module is like a little sub-program. Splitting up your code into modules helps keep things organized and readable. Let's convert the rounded-cube code above into a module and a "render" that calls the module and makes the object. We'll also put our rounded-cube-specific variables into the module:

The parentheses in box_hull(); are where we would pass an argument to the box_hull code, if one were needed. Our box_hull module does not take any arguments, although it does use the global radius parameter r.
Step 5: Make three cylindrical holes.
The module cylinder_holes below makes four cylinders, each with radius equal to 70% of the radius of the coin, so that the coin cannot fall out of the holes. We made the cylinders a little longer than the box so that they would cut out clean holes. OpenSCAD does not like it when two objects share the same faces, so we we are making the cylinders longer so as to not have faces that coincide with the faces of the rounded cube object. Each cylinder is translated to be centered and then rotated so that the three cylinders lie in mutually perpendicular directions. The "#" in front of the cylinders is only for this demo; it makes the cylinders red so that we can see them even after they are removed. Finally, in the "render" section we use difference to remove the cylinders from the rounded cube.

Step 6: Are we done yet?
To test if we are done yet, we'll make a penny-sized cylinder (note that the thickness of a penny is 1.52mm). Looking closely at where the penny meets the trap, we see that there isn't enough room; the penny intersects the trap. So we have to add something...

Actually I guess technically we're going to take away something, not add something. Specifically, we'll make a sphere just larger than the penny with a sphere_hole module and then remove it from the trap object. Notice that in the difference command, anything we add after the second line is also removed from the object on the first line.

Step 8. Make it pretty.
The edges of the cylinder holes are a little sharp, and a quick and easy way to bevel them is to remove some well-placed spheres to cut off the edges. Below we added a new cylinder_bevels module that places six spheres centered slightly outward from the faces of the trap, as shown below. Note that we've added cylinder_bevels to the list of things to be removed from box_hull in the difference command, and preceded that line by a "#" so we can see the spheres.

Step 9. We're done!
After removing our test objects and "#" tags, we can press F6 to do an export-ready compile of the object. Notice in the Console window that this process took 16 seconds. It also reports various numerical information about the vertices, edges, and faces of the mesh of the object. To export for printing, use File/Export/Export as STL.

// mathgrrl penny trap walkthrough
////////////////////////////////////////////////////////////
// parameters //////////////////////////////////////////////
$fn = 24; // facet resolution
d = 19.05; // diameter of penny
r = d/2; // radius of penny
////////////////////////////////////////////////////////////
// render //////////////////////////////////////////////////
difference(){
box_hull();
cylinder_holes();
sphere_hole();
cylinder_bevels();
}
////////////////////////////////////////////////////////////
// testing (comment out before compiling) //////////////////
//#translate([0,0,-1.52/2]) cylinder(1.52,r,r);
////////////////////////////////////////////////////////////
// module for beveling the side holes //////////////////////
module cylinder_bevels(){
b =.8*r; // radius of bevel sphere
v =1.35*r; // distance for placing bevel sphere
translate([v,0,0]) sphere(b);
translate([0,v,0]) sphere(b);
translate([0,0,v]) sphere(b);
translate([-v,0,0]) sphere(b);
translate([0,-v,0]) sphere(b);
translate([0,0,-v]) sphere(b);
}
////////////////////////////////////////////////////////////
// module for the center hole //////////////////////////////
module sphere_hole(){
sphere(r+1);
}
////////////////////////////////////////////////////////////
// module for cylindrical hole shapes //////////////////////
module cylinder_holes(){
h=.7*r; // radius of cylinder holes
rotate([0,0,0])
translate([0,0,-(r+5)])
cylinder(d+10,h,h);
rotate([90,0,0])
translate([0,0,-(r+5)])
cylinder(d+10,h,h);
rotate([0,90,0])
translate([0,0,-(r+5)])
cylinder(d+10,h,h);
}
////////////////////////////////////////////////////////////
// module for rounded cube shape ///////////////////////////
module box_hull(){
s = .2*r; // radius of small corner spheres
c = .8*r+1; // distance to centers of corner spheres
hull(){
translate([c,c,c]) sphere(s);
translate([-c,c,c]) sphere(s);
translate([c,-c,c]) sphere(s);
translate([c,c,-c]) sphere(s);
translate([-c,-c,c]) sphere(s);
translate([-c,c,-c]) sphere(s);
translate([c,-c,-c]) sphere(s);
translate([-c,-c,-c]) sphere(s);
}
}
To wrap up our Penny Trap series, here is a YouTube video from Kanal von aquauit showing a coin trap printing and enclosing the coin along the way: